Your Safer Source for Science
All-In-One Science Solution
Your Safer Source for Science
;
Address P.O. Box 219 Batavia, IL 60510
Phone 844-200-1455
Fax
Email [email protected]
PMP plastic graduated cylinders are almost as clear as glass, are very strong and will resist breaking after frequent impacts. Chemical resistance is outstanding except in the presence of very strong oxidizing agents.

See more product details

Options:

(Select option to see volume pricing availability)

Product Details

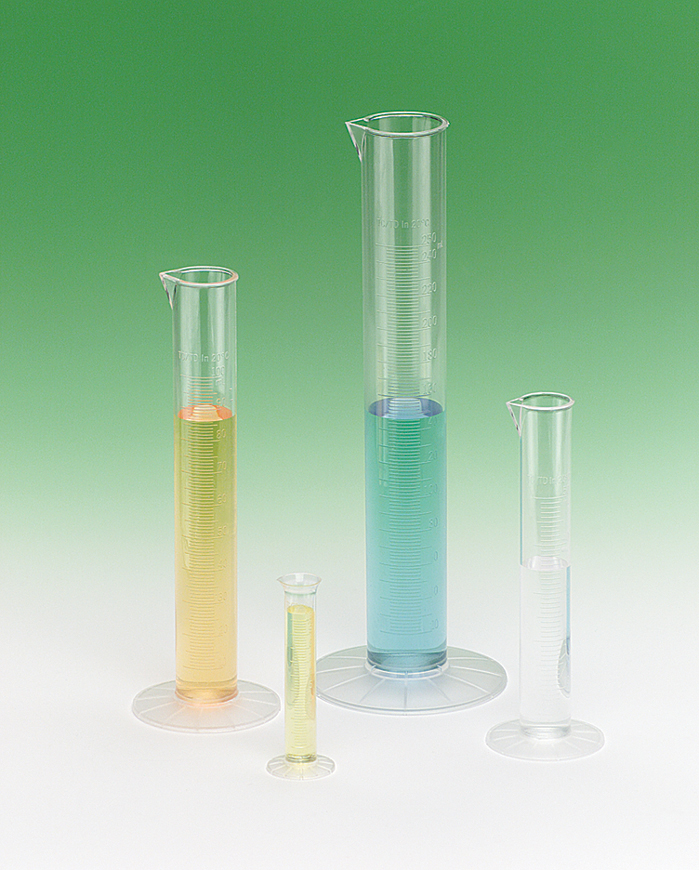
Graduated Cylinders, Polymethylpentene - Economy Choice

Polymethylpentene plastic is almost as clear as glass. It is very strong and will resist breaking after frequent impacts. Generally, the chemical resistance is outstanding except in the presence of very strong oxidizing agents. Prolonged exposure to hydrocarbons will cause the plastic to cloud. These graduated cylinders are precision molded and usable to 175 ºC. You will find these graduated cylinders worth the investment.  To reduce breakage, plasticware provides a durable alternative to glassware, especially for young students.  While Graduated Cylinders, Polymethylpentene do not provide the same chemical and heat resistance as glass, it is a cost-effective alternative in some applications. 


A graduated cylinder is a cylindrical vessel with a narrow, uniform diameter that features volume markings along its side. These markings typically represent milliliters (mL) or cubic centimeters (cm³). It's designed to provide precise measurements of the volume of liquids. This invaluable tool allows scientists and students alike to measure, mix, and pour liquids with precision, making it a cornerstone of almost any school classroom science laboratory. 

Flinn Scientific’s Graduated Cylinders made from polymethylpentene (PMP) are an economical and reliable choice for all your measurement needs in the lab. Available in capacities ranging from 10 mL to 1000 mL, these graduated cylinders offer precise volume measurements with superior clarity and durability.

Constructed from high-quality polymethylpentene, these cylinders are designed to withstand harsh laboratory conditions while remaining lightweight and easy to handle. PMP provides exceptional chemical resistance, ensuring compatibility with a wide range of laboratory reagents and solvents. Additionally, the transparency of PMP offers excellent visibility, making it easy to read the clear, molded graduation marks.

The hexagonal base provides stability and minimizes the risk of tipping over, while the tapered spout allows for smooth, drip-free pouring. These features make the Flinn PMP Graduated Cylinders ideal for educational settings and research labs requiring safe and accurate liquid measurement.

Key Features of Polymethylpentene Graduated Cylinders:

Accurate and Precise Measurements: The molded graduations ensure easy and accurate volume readings, even at lower volumes.

Durable and Lightweight: PMP material is lightweight yet durable, offering excellent chemical resistance and shatterproof properties.

Stable Hexagonal Base: The wide hexagonal base provides stability to reduce the risk of spills and breakage.

Smooth Pouring Spout: The tapered spout design allows for precise, drip-free pouring.

Benefits of Flinn's Economy Choice PMP Graduated Cylinders:

Affordability and Quality: An economical alternative to glass, these cylinders offer high-quality performance at a fraction of the cost.

Chemical Compatibility: Compatible with most chemicals and reagents, ensuring versatility in various laboratory applications.

Easy to Clean: PMP is resistant to staining and easy to clean, providing convenient maintenance between uses.

These graduated cylinders are perfect for general chemistry labs, biology experiments, and any situation requiring precise measurement of liquids. Their lightweight and shatterproof design make them a safer alternative to glass cylinders in classroom environments, where student safety is paramount.

Enjoy the ideal combination of affordability, durability, and accuracy with Flinn’s PMP Graduated Cylinders. Flinn Scientific offers a wide range of laboratory glassware and plasticware ideal for your science school lab.


Graduated Cylinder Parts 

Before we dive into how to use a graduated cylinder effectively, let's familiarize ourselves with its key components: 

Base: The flat bottom of the cylinder ensures stability when placed on a level surface. 

Body: This is the main part of the cylinder, where volume measurements are taken. It is usually made of transparent material like glass or plastic. 

Spout: The spout facilitates controlled pouring of liquids, minimizing the risk of spillage. 

Meniscus: This is a crucial element we'll discuss in detail later. It's the curved upper surface of the liquid inside the cylinder, and it's where you'll read the volume. 


How to Read Measurements on a Graduated Cylinder 

Reading measurements on a graduated cylinder may seem daunting at first, but with practice, it becomes second nature. Here's a step-by-step guide for high school students and teachers for school classroom science laboratories: 

Step 1: Prepare the Graduated Cylinder 

Start by selecting the appropriate graduated cylinder for your task. High school labs typically have cylinders with various volume capacities, such as 10 mL, 25 mL, 50 mL, 100 mL, and 250 mL. 

Clean the cylinder to ensure accurate readings. Any residue on the walls can affect measurements. 

Step 2: Fill the Graduated Cylinder 

Pour the liquid you want to measure into the graduated cylinder. Use a funnel if necessary to avoid spills. 

Add the liquid carefully, allowing it to settle and minimize splashing. 

Step 3: Identify the Meniscus 

The meniscus is a critical concept in reading a graduated cylinder. It occurs due to the surface tension of the liquid, causing it to form a curve at the liquid's edges. To read measurements accurately, follow these steps: 

Ensure the graduated cylinder is at eye level, with the cylinder's bottom resting on a level surface. 

Gently squat or bend down to be at the same level as the meniscus. This perspective minimizes parallax errors, where the liquid level may appear higher or lower than it actually is. 

Read the measurement at the lowest point of the meniscus. In most cases, the liquid will form a concave curve, and you should align the measurement with the bottom of this curve. 

Step 4: Record the Measurement 

After identifying the correct measurement on the graduated cylinder, record it in milliliters (mL) or cubic centimeters (cm³) as per your lab's requirements. Ensure you include the appropriate number of decimal places, typically to the nearest tenth of a milliliter. 

Step 5: Handling Precise Measurements 

If your experiment requires the utmost precision, use a dropper or a pipette to add or remove small amounts of liquid until you reach your desired volume. Graduated cylinders are excellent for initial measurements, but fine adjustments may require more accurate tools.


Understanding the Meniscus of a graduated cylinder: 
 

In the world of graduated cylinders, the meniscus takes center stage. This term may sound complex, but it's a fundamental concept for anyone aiming to achieve precise measurements. The meniscus is the curved surface that forms at the top of a liquid inside the graduated cylinder. Understanding how to read the meniscus correctly is essential for obtaining accurate volume measurements. 

Why Does the Meniscus Form? 

The meniscus phenomenon arises due to the interplay between adhesive and cohesive forces within the liquid. Here's how it works: 

Adhesive Forces: These are the forces that attract the liquid molecules to the walls of the graduated cylinder. The strength of these forces depends on the liquid's properties and the material of the cylinder. In most cases, water adheres to glass, creating a concave meniscus. 

Cohesive Forces: Cohesive forces are the interactions between the liquid molecules themselves. These forces tend to pull the liquid upward, forming a convex meniscus. However, adhesive forces usually dominate, creating a concave meniscus. 

Reading the Meniscus Correctly 

To read the volume of liquid accurately, you need to identify and interpret the meniscus correctly. Here's how to do it step-by-step: 

 Eye Level: Ensure that the graduated cylinder is at your eye level, and the bottom of the cylinder is resting on a flat, level surface. This perspective eliminates the influence of parallax errors, which can lead to inaccurate readings. 

Curved Surface: Gently squat or bend down so that your eyes are level with the curved surface of the liquid inside the cylinder. The meniscus should be clearly visible. 

Reading Point: Look closely at the meniscus. It will either be concave (curving downward) or convex (curving upward), depending on the liquid and material of the cylinder. 

Align with Lowest Point: When reading the volume, make sure to align your measurement with the lowest point of the meniscus. This is where the true volume is indicated. 

Decimal Places: Record the measurement in milliliters (mL) or cubic centimeters (cm³) based on your lab's requirements. Pay attention to the appropriate number of decimal places, typically to the nearest tenth of a milliliter. 

******************************************************** 

Meniscus Reading Examples 

Let's consider two scenarios to illustrate how to read the meniscus correctly: 


Scenario 1: Concave Meniscus 

If you're measuring water in a glass graduated cylinder, you will typically encounter a concave meniscus. To read it accurately, follow these steps: 

Ensure eye level alignment with the meniscus. 

Identify the lowest point of the curved surface. 

Record the measurement at that point. For instance, if the lowest point of the meniscus aligns with the 45 mL mark, you should record 45 mL as the volume. 

Scenario 2: Convex Meniscus 

Some liquids, like mercury, exhibit a convex meniscus when measured in a glass graduated cylinder. Here's how to approach it: 

Again, ensure your eye level is aligned with the meniscus. 

Identify the highest point of the curved surface. 

Record the measurement at that point. For example, if the highest point of the meniscus aligns with the 30 mL mark, you should record 30 mL as the volume. 

By mastering the art of reading the meniscus correctly, high school science teachers and students can enhance the accuracy of their measurements and ensure the reliability of their experiments. It's a fundamental skill that serves as the cornerstone of precise volumetric analysis in any scientific laboratory.